Using visual aids can be helpful for young children.
When we talk about things, it might go in one ear and out the other…
But when we add a visual support, we add another way to support our child’s understanding and experience of learning.
On the corresponding podcast episode, “Visual Supports: An Introduction,” we used music to give you ideas for creative ways to use pictures or real objects.
We related them to personal experiences – as well as creating experiences through music and play.
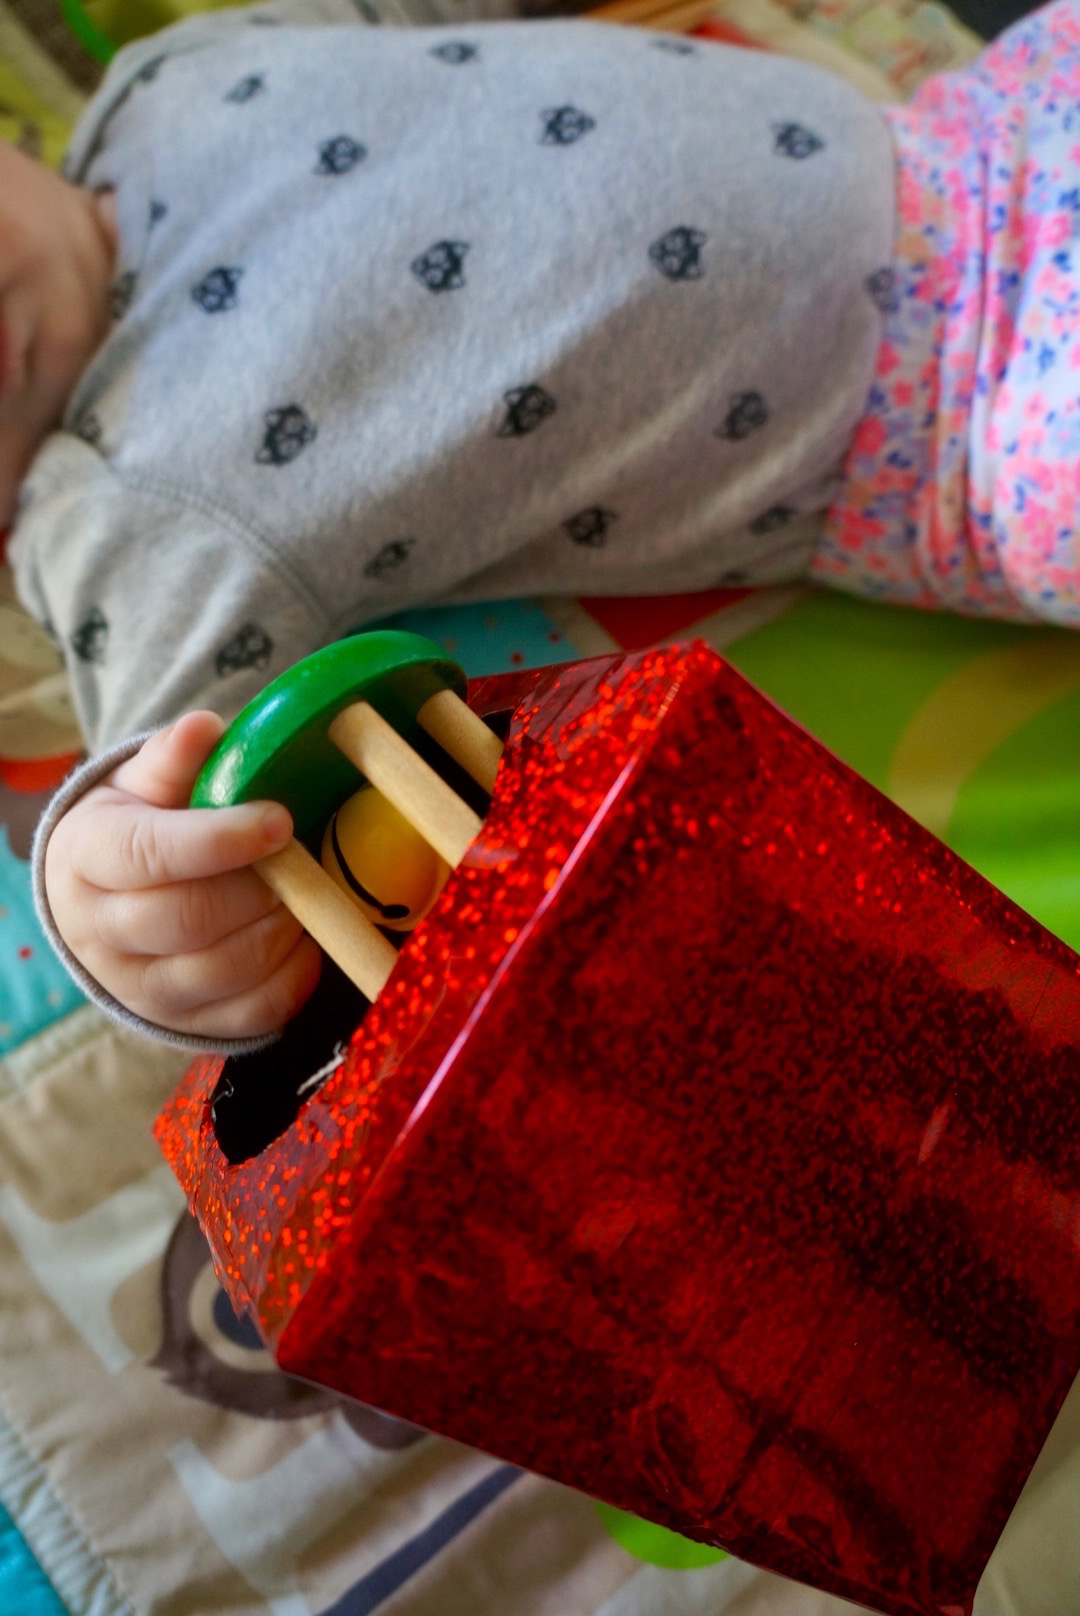
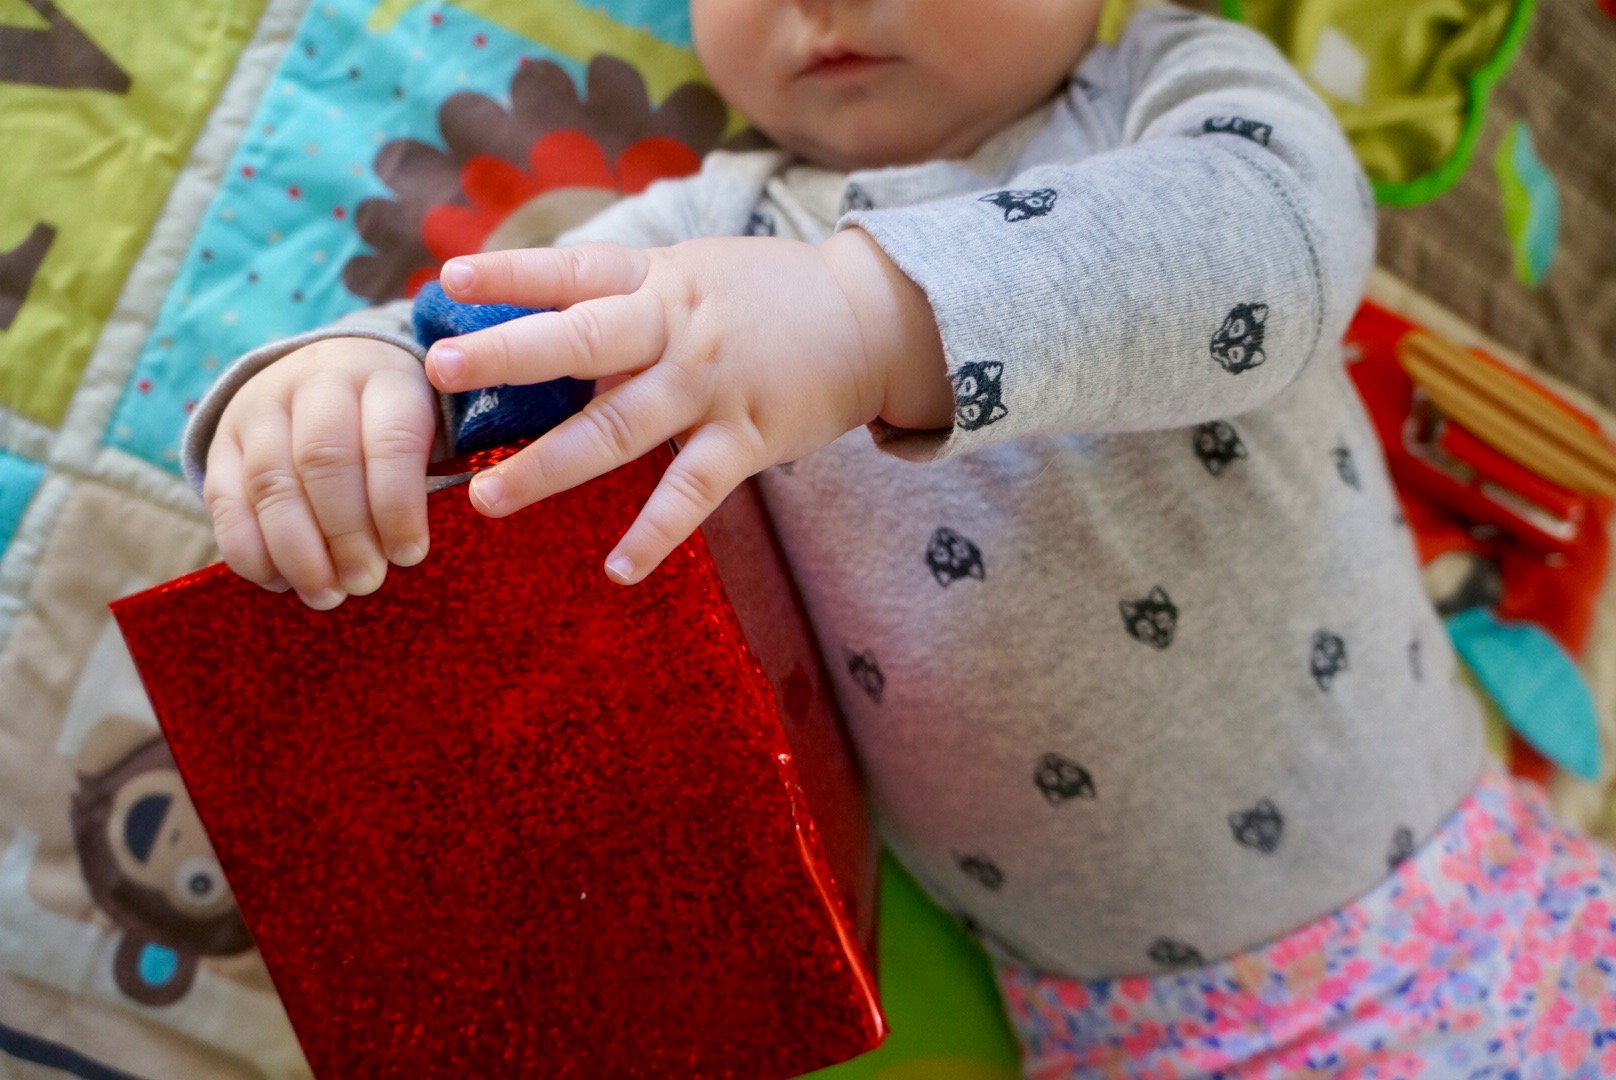
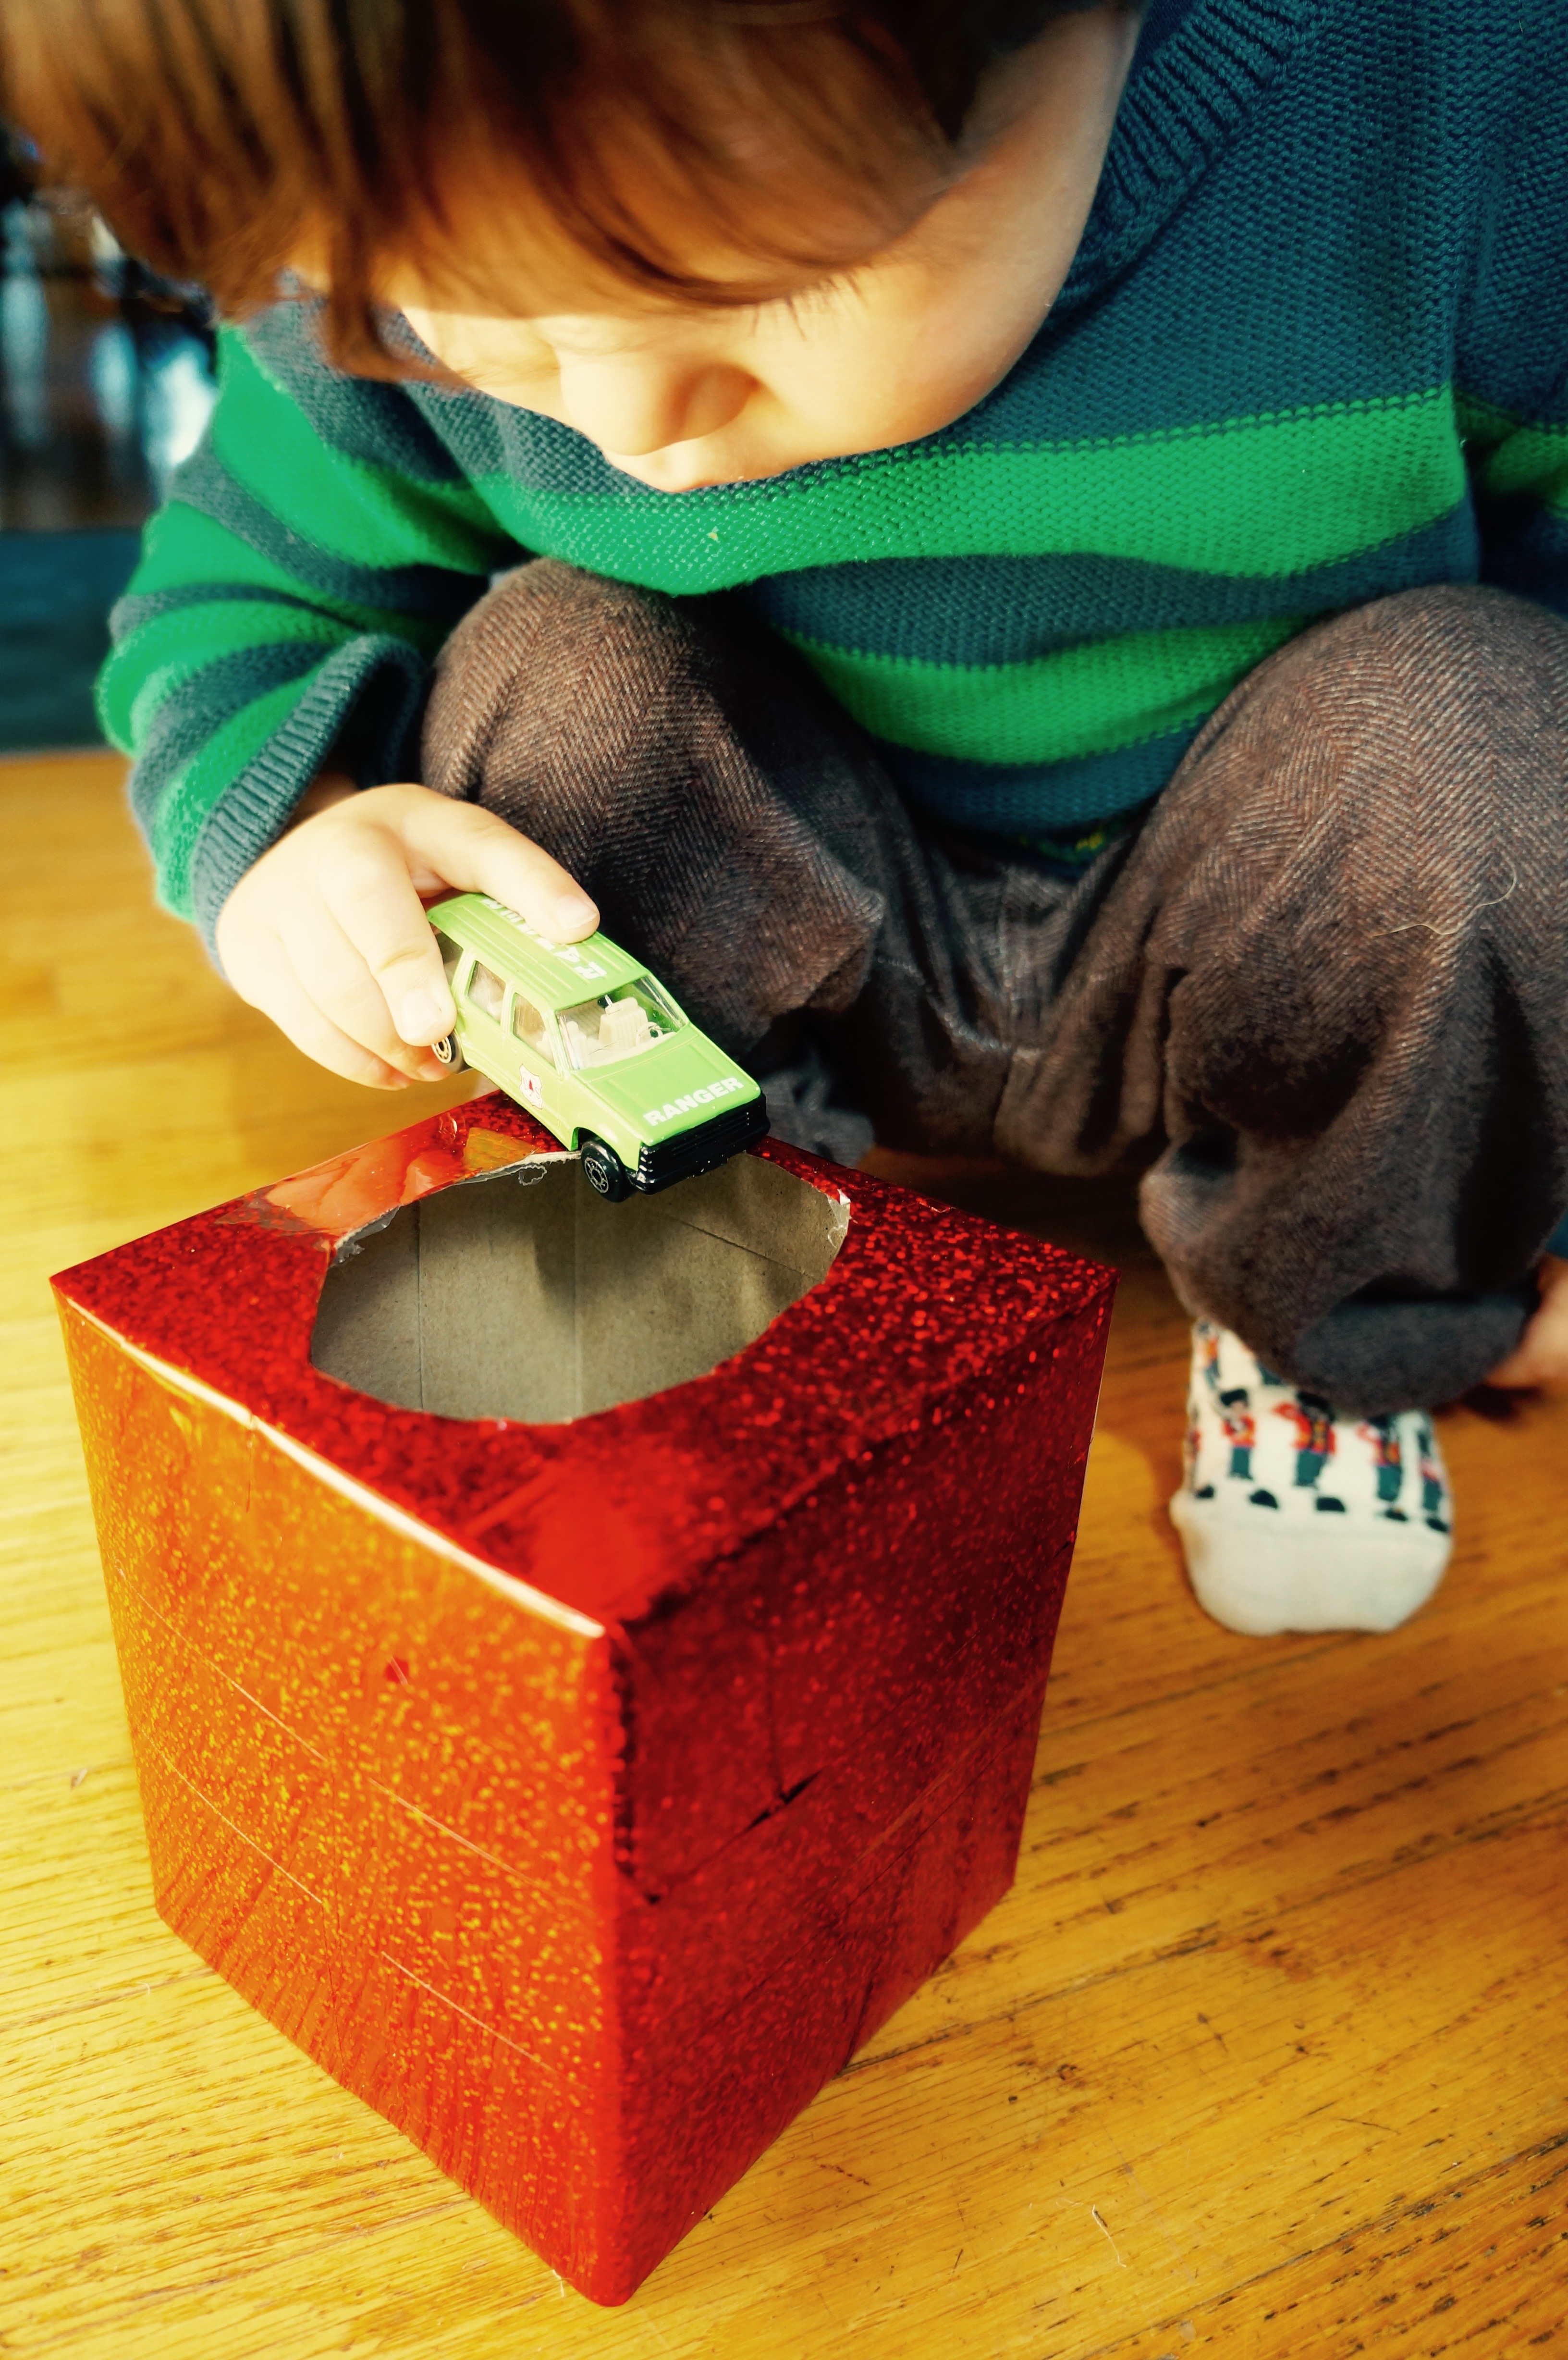
A tissue box already has the advantage of having a perfectly-sized hole for a hand or smaller hands.
We used pictures and objects from a variety of categories to give you, the caregiver, ideas to reach in and grab these hidden items.
Don't Miss our Corresponding Podcast Episode!
Materials to create your own DIY tissue box of mystery:
- Empty tissue box (square or rectangle) OR nesting doll/stacker (the larger “eggs” in the one featured below is wonderful because it is very easy for tiny hands to open, requiring nothing more than a simple nudge)
- Decorative/colored duct tape or washi tape, OR scrapbook/construction paper OR images from magazines
- A variety of objects or images, chosen by category (i.e., all green objects, all animals, etc.) or simply by what you find in your home quickly that is safe for baby! (Feel free to use your “DIY Animal Images” here!)
Instructions to create your own DIY tissue box of mystery:
- Once you have ensured your tissue box is empty, decorate it as you see fit – with the colored tape, with construction paper that has been decorated by you or your little one, with images from magazines of your own choosing…
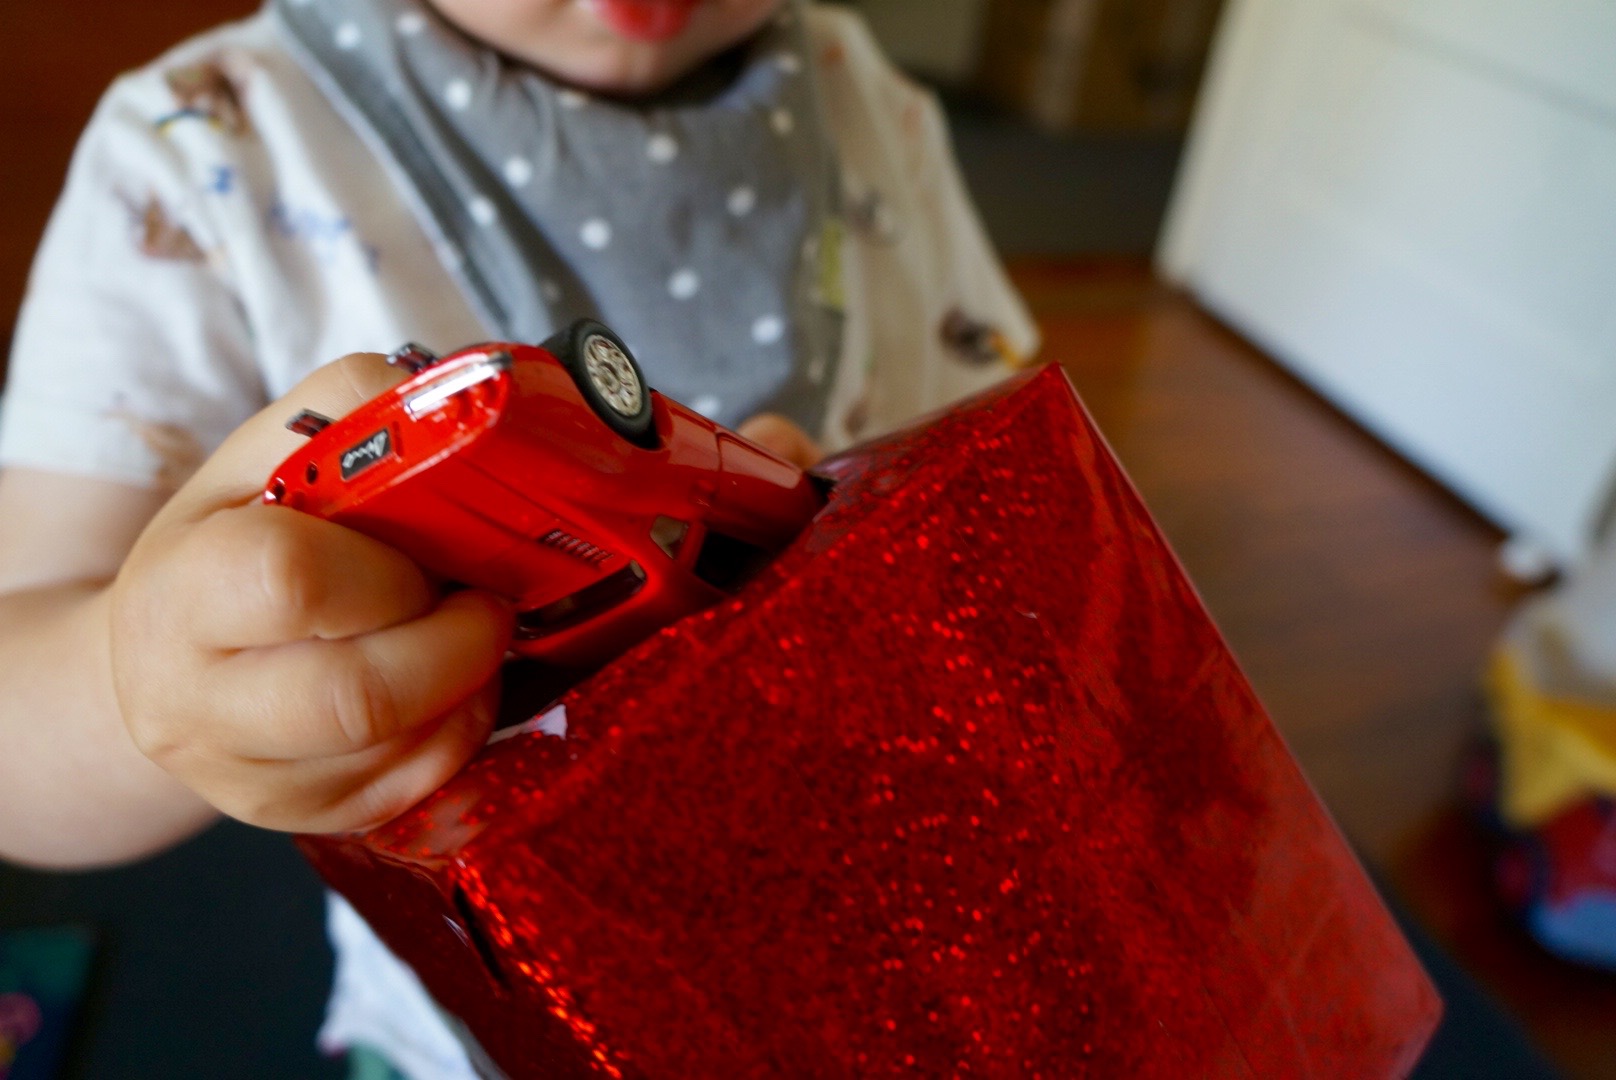
- Select several baby-friendly objects from your home, and place them inside. If you have an older and younger child, you might enlist a helper to choose objects for the little one. They might be common household objects from the kitchen or bathroom, items from the playroom, pictures of family or friends, or images from magazines (you might choose to laminate or protect images so they don’t get destroyed the first time around!) Use good judgment and always remain present when presenting new items to a young baby.
- Sing a song or chant about what might be inside. This step is nice because it adds an interactive and repetitive (hence, ritualistic) element to the activity.
- When your child pulls out the item, talk about what you see (instead of simply labeling or asking a verbal child, “what’s this?”). Here are a few ideas to get you started:
- What does the object do, or what sound does it make?
- How might we use this object? (Making silly guesses can be a great way to keep a toddler engaged)
- Use describing words (adjectives) to add more language – it’s not just a car, it’s a green / smooth / big / wide / ___ car!
- Relate the object to previous experiences your child has had, or to friends and family
- Talk about emotions (this is obviously easier with animate objects, or images of people or animals) – “that dog is standing over his bowl! He must be hungry!” or “this poor boy is crying – he looks so sad! I wonder what happened?”
Ages
- From around 3-4 months old, babies typically start to reach and grasp (and, of course, mouth!) They start to see farther away from them, and may be able to “rake” (with their whole hand) an object from the edge of a box, or grasp one out of your hand. Even very young babies will benefit from the language in which you will bathe them during this activity.
- This activity can be easily adapted for older toddlers as well, as they will enjoy making predictions, grabbing objects independently, and playing/talking about many of the items you’ve chosen.
This post contains affiliate links. All activities described by Learn With Less assume close and continuous supervision of the child by an adult.
ToddlerApprovedTuesday oooo I’ve got a tissue box that will be empty soon , bingo
I have a little one that is obsessed with pulling baby wipes out of the packet so this is a much better idea for her! I have a nearly empty tissue box too. Thanks for linking up to #ToddlerApprovedTuesday